
Tutorial: Window Sills and Casings
Kristen and I have been wanting to install window sills and casings on our family room and kitchen windows for a long time. We have been putting it off for a long time as other projects have come up first. When Kristen received some money for her Birthday, she asked to buy wood for the window sills and casings.
We started by determining the materials we wanted to put around the window. We decided to match the casings to the casing around our doors. We wanted to match the crown molding under the window sills to the crown molding we used at the stair cap.
Estimated Project Cost: $200.00 (This cost will depend completely on the amount you are covering.)
Difficulty: Medium

We forgot to take a before picture of the three windows in the family room, but we dug through our photo archives and we found one from when we moved into our house in 2008.

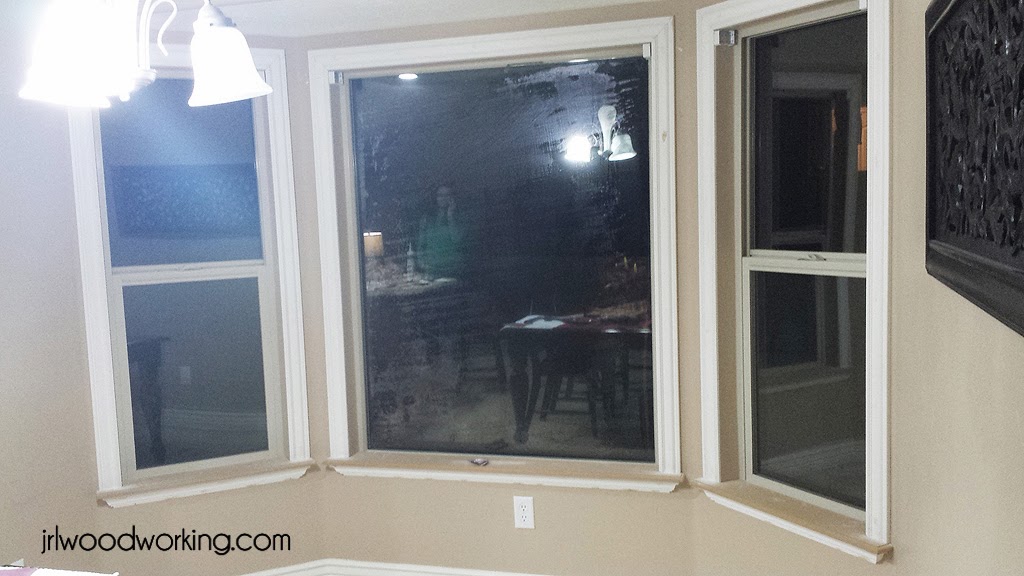
We did remember to snap a before picture of the bay window. It looks extra bare because we had already take down our curtains.

The depth of our existing window sills were about 3 1/8" deep. We decided to buy 3/4-inch MDF at 5 1/2 inches deep for the window sills and the header piece at the top. We made sure the sill would extend past the casing by about 1/2-inch. The casings were 3 inches wide, so we measure the window opening and added 7 inches to the length of the sill (3 1/2 inches on each side. Then we drew the notches in the 3/4-inch MDF and cut them out with a jig saw. We routed the edges with a 3/8-inch roundover bit. We raised the bit high enough to get beading at the top. This also matches the cap on the stair wall.
The existing window sills sloped away from the window, so we had to level the window sill. We used wood shims to level it out. We used a torpedo level to check the level and glue it down with dabs of liquid nails adhesive. I then used my nail gun to nail it in place while the adhesive dried.
The existing window sills sloped away from the window, so we had to level the window sill. We used wood shims to level it out. We used a torpedo level to check the level and glue it down with dabs of liquid nails adhesive. I then used my nail gun to nail it in place while the adhesive dried.

After the window sills were level and secured, we cut out the casings. We held the casing flush with the existing window jambs. The window opening wasn't perfectly square, so I used sandpaper to make minor adjustments to the miter angle. We held them all up in place and then nailed it together with my finish nailer.

At this point, it looked really weird to me. I think the weirdness was because I wasn't used to it and because the window sill part wasn't primed at all.

We finished off the window sills with the crown molding under the window sills. We matched the overhang on the side with the overhang on the front. It was about 1/2-inch from the edge of the 3/4-inch MDF.
We used the exact same crown molding as we did on the cap on the stairs (remember this project?) so they would match perfectly.
We used the exact same crown molding as we did on the cap on the stairs (remember this project?) so they would match perfectly.
Once we got to this point, the hard work started.

Taping, caulking seams and gaps, filling the nail holes, sanding and then painting. The finish work is by far the hardest part. Kristen painted a prime coat and then two finish coats.

This is the point where we started to get excited about the windows! They were looking absolutely beautiful.

Paint was finished! They still looked a little bare without curtains though.


Finished!

You can tell from the before and after picture what a difference it makes to have window sills and casings. We are so happy with them!
The next project, the biggest project, was the three windows in the family room.

Remember the before picture? Kristen always thought the three windows there looked really plain. She had a certain design for these three windows in her head. She drew it out on a piece of paper for me and we got to work.

Since these window are so close together, I wanted to have one big long continuous window sill under them. We measured a whole bunch, used a jig saw to cut out the notches, then we routered the top. We carried it upstairs, used shims to make it level, glued it in, and finished it off with some nails.

For the top piece above the windows, Kristen wanted to do something a little more dramatic. We used a flat piece of MDF (3/4-inch by 5 1/2 inches), then we cut and routered a little transition piece for the bottom (1 1/4-inch wide with a full bull nose--we used a 3/8-inch roundover bit on the router and set it so we could flip the piece and get a full bull nose), and attached those two pieces together. We nailed that into place above the windows (which, were also not level.. so annoying!). Once it was on, we attached the crown molding around it.

The last part to do was a final piece above the crown. We had to cut it to size on the table saw, then we routered it, and put it into place using glue and finish nails. Once the top piece was finished, we got to work on the casing pieces. We did the casing last so we could get the exact measurement for length between the top piece and the window sill piece.

Since the windows are so close together, we had to trim about 1/8-inch off of each casing piece in the middle. Then we were able to butt them together and it fit perfectly. Then, when we got to this point, we realized that we were two pieces short of trim. We were so mad! We were so close to having it completely finished and we were mad that we had a little set back. The worst part about this whole project was not being able to put blinds onto our windows until we were finished. We didn't take too many pictures because we were in a big hurry to get these painted so we could get our blinds back up.

Even though we were missing the two side casing pieces, we decided to get it taped, caulked, holes filled, and primed. This was the really exciting part! Having paint on it made us really be able to see what the finished project was going to look like.

I made a special trip to get casing pieces on my way home from work so we were able to finish up the windows. We finished the painting and the finish work, got our blinds back in, and then we celebrated! We are so happy with how everything turned out. It is a dramatic difference and improvement to have the window sills and casings done.
We got things cleaned up and our furniture back into place. It looks so pretty!


See the before and afters below. It makes such a big difference.


We finished up the window above the kitchen sink as well. Having window sills is almost life changing. It makes cleaning them so easy and they look so much better.
interesting happened! so pretty soon it became a dining room! I think in their way to try
ReplyDeleteDownload 16,000 Woodworking Plans & Projects
ReplyDeletehttp://cnnwood.weebly.com
16,000 Woodworking Plans With Step-By-Step Details, Photos, Materials Lists And More!
Arbor Projects ,
Adirondack Chairs ,
Artwork Display ,
Bathroom Unit ,
Box Designs ,
Billiard/Pool Table ,
Barn Plans ,
Bed Plans ,
Bedside Cabinets ,
Bee Hive Plans ,
Bench Projects ,
Bird Feeders ,
Birdhouse Plans ,
Boat Plans ,
Book Case Plans ,
Baby Changing Table ,
Coat Rack ,
Cabin Plans ....
Interesting happened! so pretty soon it became a dining room! I think in their way to try. Bedroom Furniture nz
ReplyDeleteits wonderful article. Relentless Software Technology
ReplyDeleteInteresting happened! so pretty soon it became a dining room! I think in their way to try. Dog Play Pens
ReplyDeleteInteresting happened! so pretty soon it became a dining room! I think in their way to try.Pet Shaver
ReplyDeleteThis is a smart blog. I mean it. You have so much knowledge about this issue, and so much passion. You also know how to make people rally behind it, obviously from the responses. thoptv pc, thop tv for windows
ReplyDeleteInteresting blog. It would be great if you can provide more details about it. for more info
ReplyDeleteThanks you
A well-designed kids study table can make a big difference in helping children focus and enjoy their study time. When choosing a kids study table design, look for features that balance comfort and functionality. A good table should have enough surface space for books, a laptop, or drawing materials, and ideally include storage options like drawers or shelves for organization.
ReplyDeleteProfessional window cleaning makes a real difference. Anacortes window cleaning
ReplyDelete